Make sure the LED screen is already
mapped correctly on your end before proceeding.
Please note that if your LED height or width is less than 170, the QR code will not display.
The configuration below assumes your LED display setup and mapping have been completed.
1- Find your device’s serial number (S/N)
Locate the sticker on your Novastar device and write down the serial number for later use.
2- Download Viplex Express
Get it from:
3- Install Viplex Express
During setup, select Async Mode as your working mode.
4- Enable the “User Software” tab
- Click on one of the displayed screens.
- Type novasoft (not in the search bar).
- A new tab called User Software will appear.

5- Decide how to connect your device to the network
- You can use Ethernet (recommended) or Wi-Fi.
- If using Ethernet:
- Plug an Ethernet cable directly into the device.
- Skip to Step 8.
- If using Wi-Fi:
- Attach the Wi-Fi antenna to your device for better signal strength.
- Continue to Step 6.
6- Connect your device to your PC via USB
- Make sure to connect the USB to the port in the image
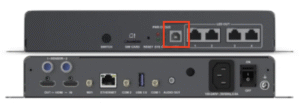
- Only one device can be configured at a time.
7- Configure Wi-Fi settings (only if using Wi-Fi)
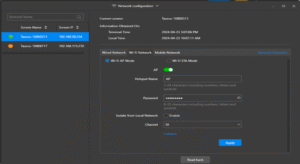
- Go to Terminal Control → Network Configuration.
- Select your device (its name should match the S/N from Step 1).
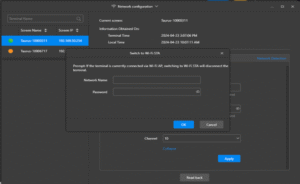
- Under Wi-Fi Network, choose Wi-Fi STA Mode.
- Enter your Wi-Fi details, then click Apply.
(If “Wi-Fi STA Mode” isn’t visible, scroll down to find the list of available networks.)

8- Open the User Software tab
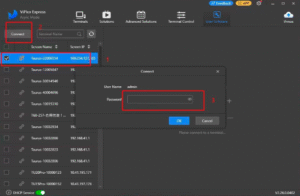
- If your device appears but shows as Offline, click Connect.
- Enter the admin password. It will be one of the following:

9- Setup Toggles
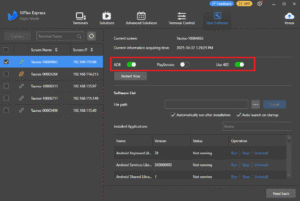
- In the User Software tab, disable Play Service and enable ADB.
10- Download the iGotchaSignage APK
- Make sure you have the latest version of the iGotchaSignage APK saved on your computer before proceeding.
iGotcha Apk
11- Install the iGotchaSignage app
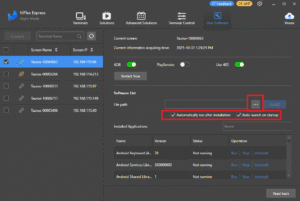
- In the User Software tab, check both boxes:
- Automatically run after installation
- Auto launch on startup
- Browse to select the iGotchaSignage APK, then install it.
12- Reconnect your USB cable
- Unplug the USB cable and plug it back in.
13- Run the appropriate installer
- Download and run the correct installer file for your setup.
- (Run it directly — do not upload it through Viplex.)
TitaniumSynergy
Fabulux
Nexnovo
Rgbs
UnivewLED
iGotchaMedia
- Select your time zone and language, resolution and device type, and install
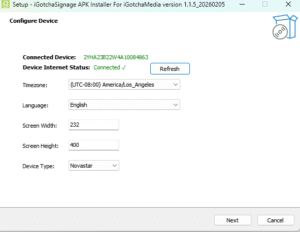
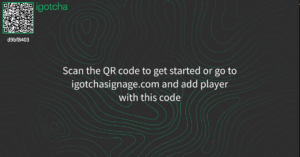
- A QR code will appear on screen (similar to the picture below).
- Note: Do not use the QR code in the actual picture below.
